I didn’t realize but I actually did complete this one by accident, albeit not in the scale I intended.
A while back I had a chat with someone who was asking people to teach them about a topic of their own choosing, with a quick walkthrough. So obviously, I chose Print Production. (very predictable of me, of course!)
Below is what topics I lightly covered with some extra commentary in text that is far more shortened than it was on the call where I actually got to verbally talk about the topic;
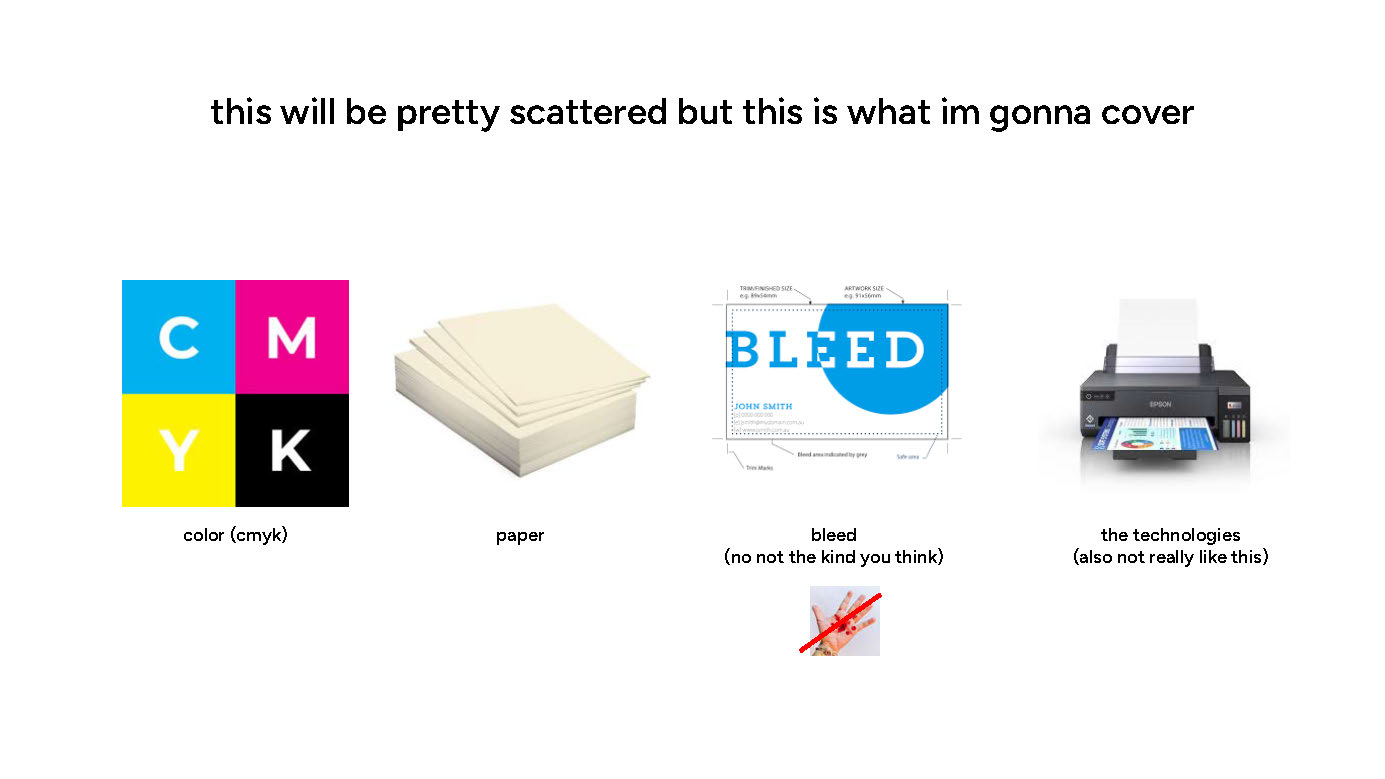
color
cmyk
CMYK stands for…. the colors it represents. But if you are a visual creative you probably knew about this!
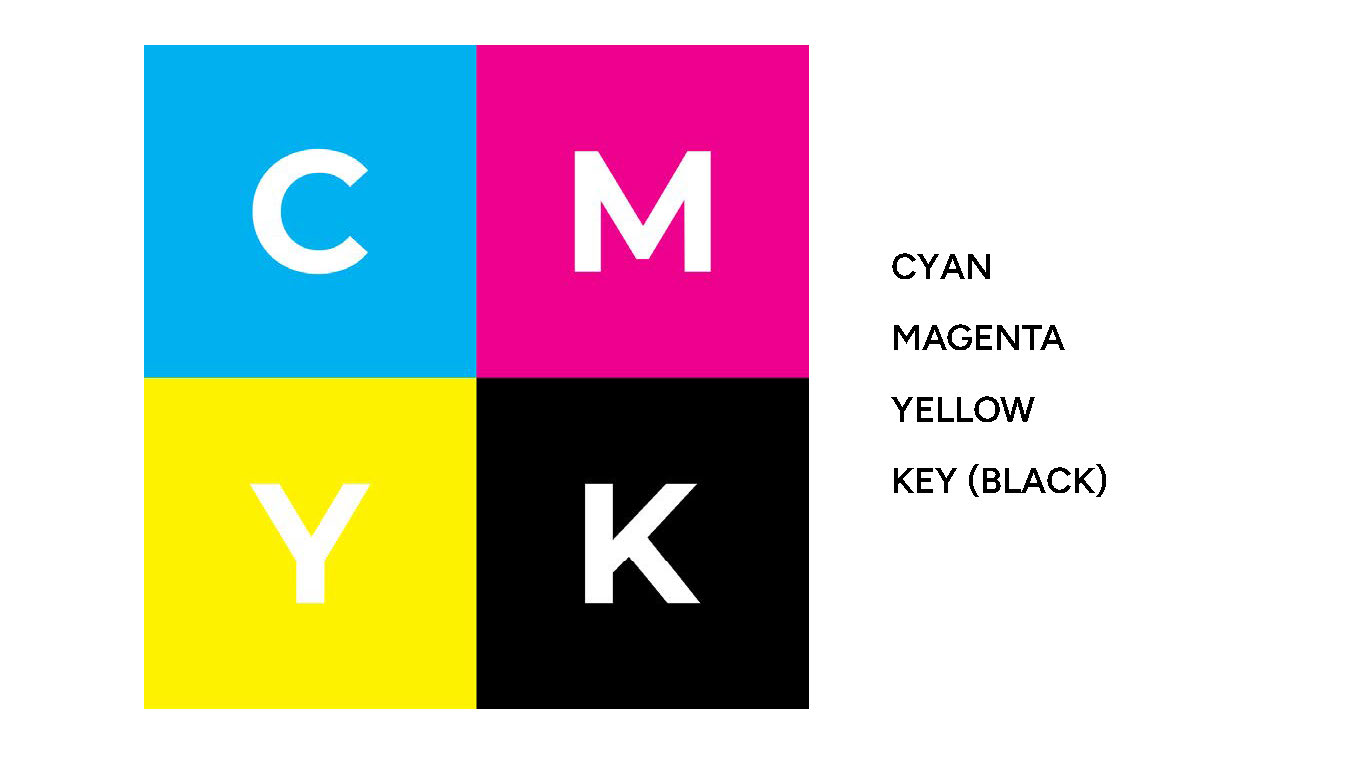
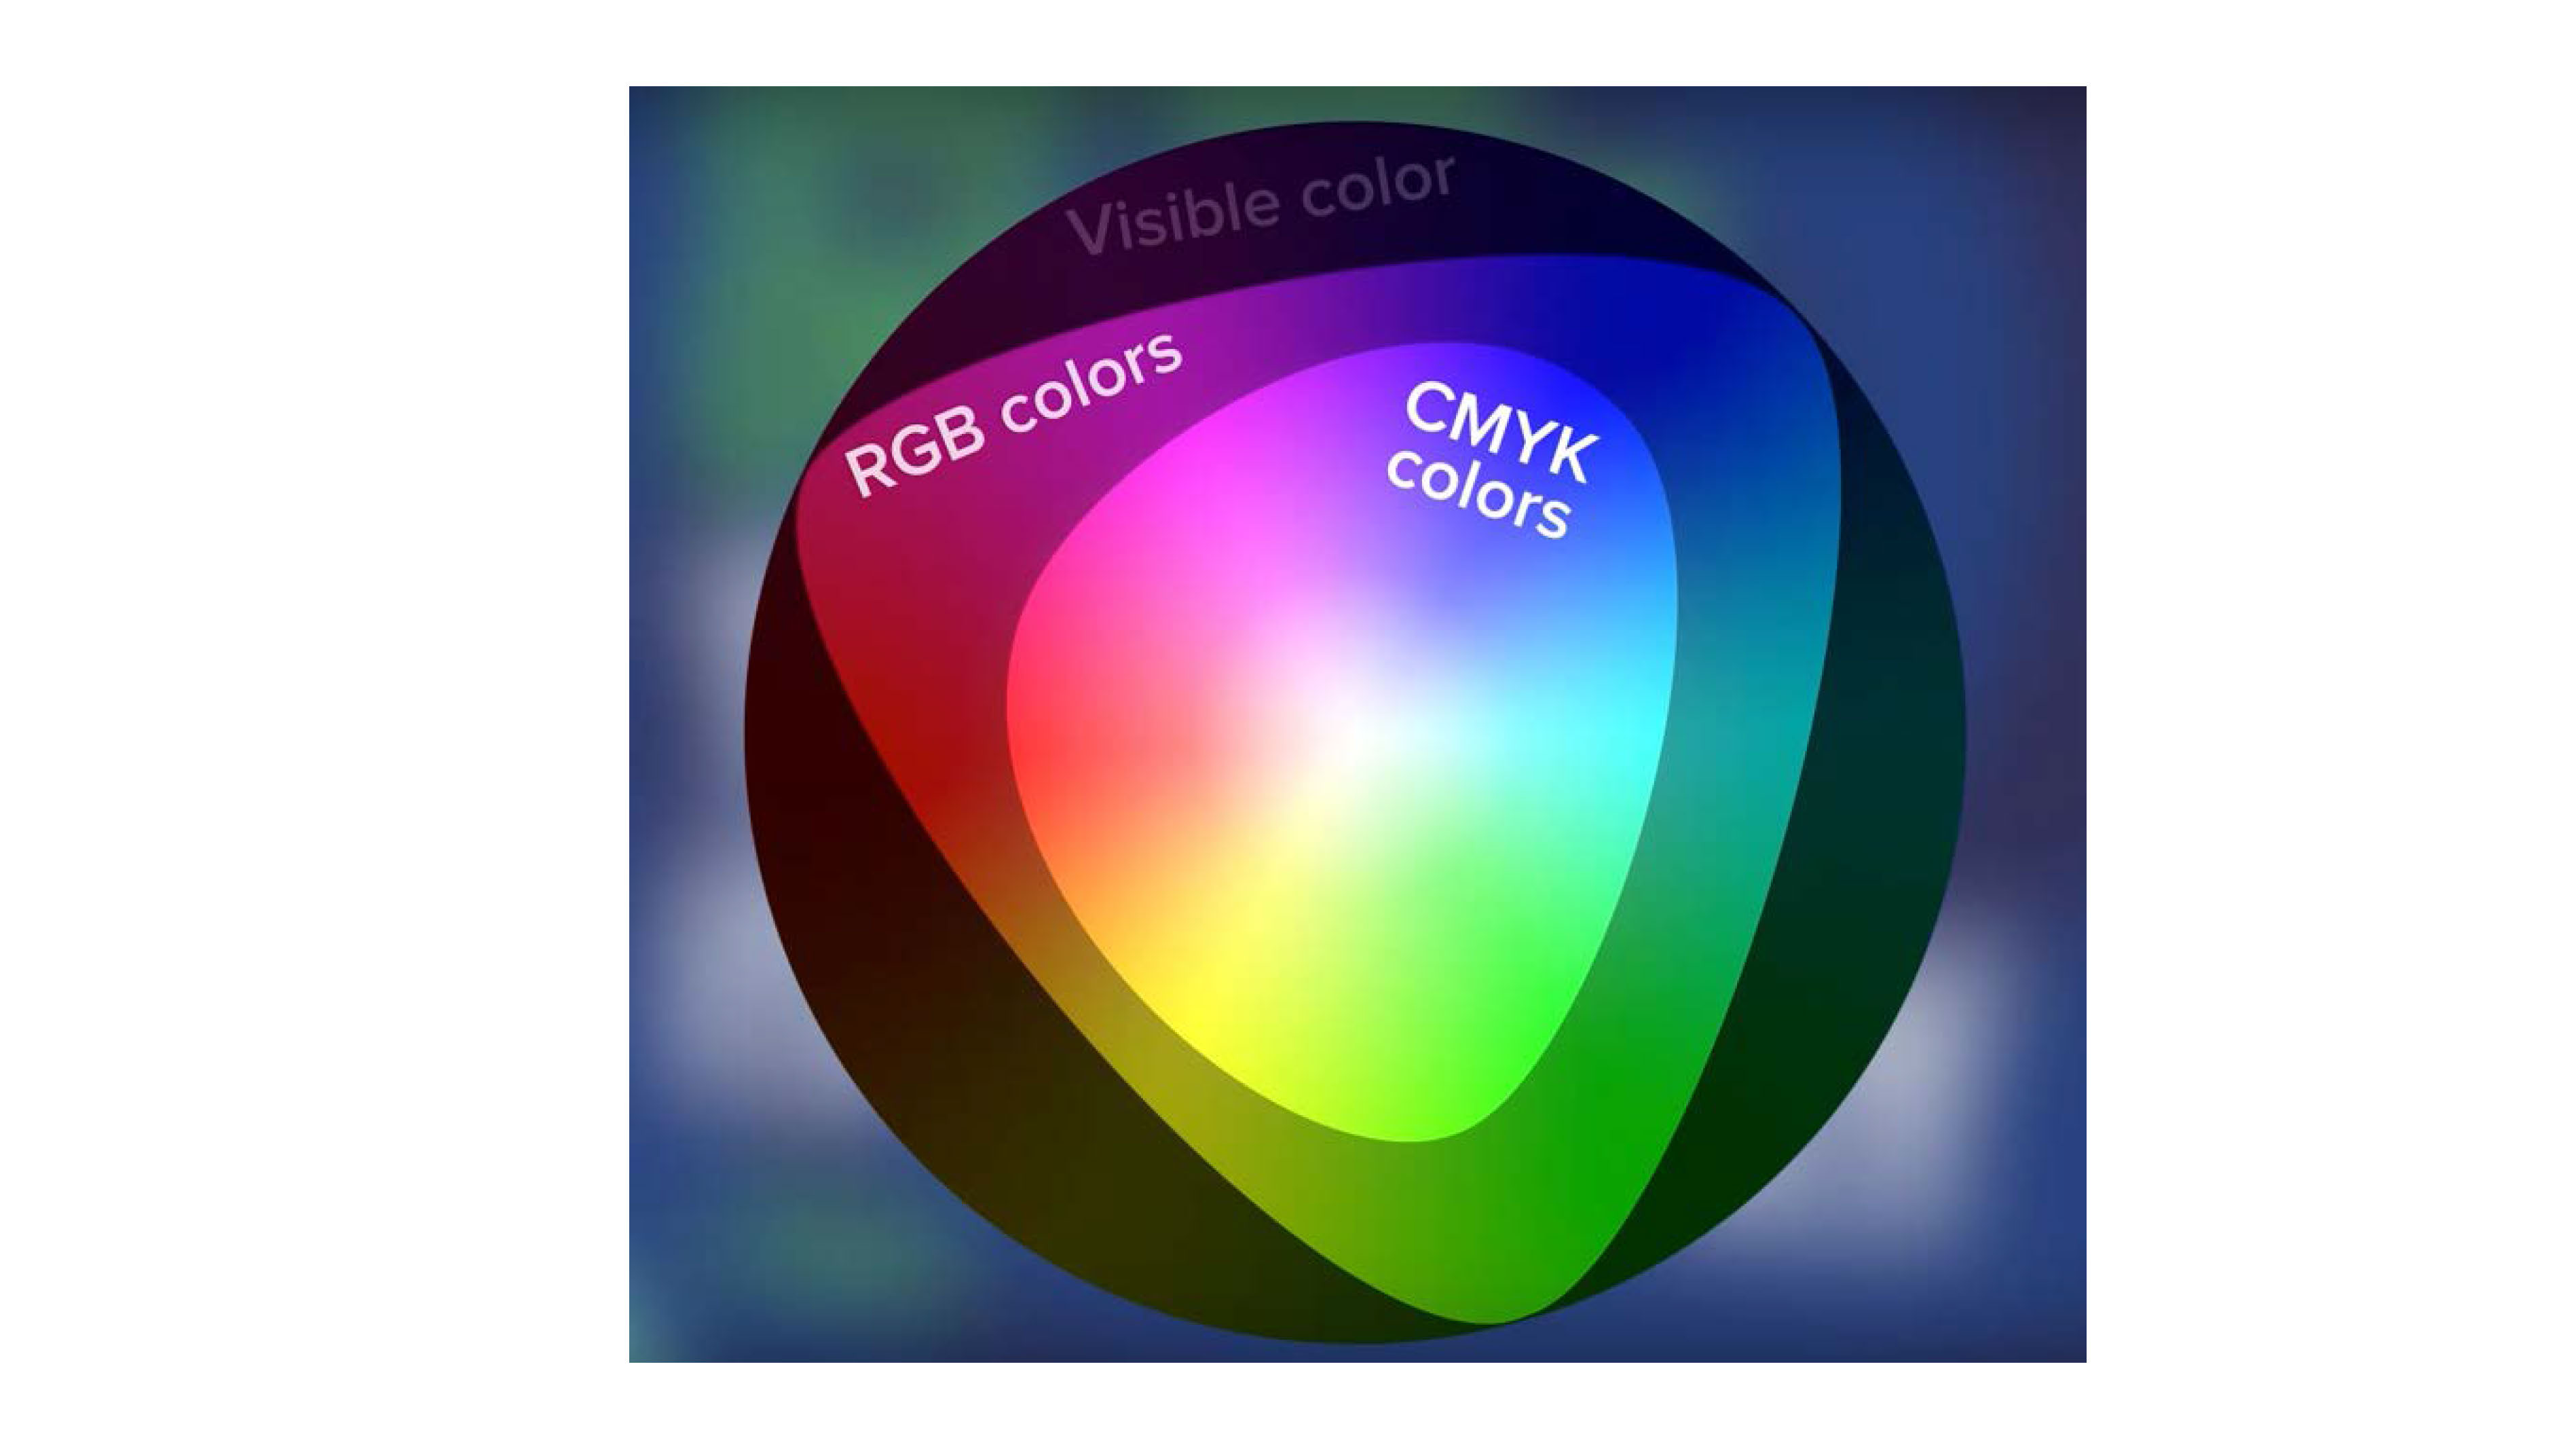
CMYK is unfortunately not quite as wide of a color range vs. RGB (which unfortunately makes printing artworks a bit complicated at times.), as it is based on inks mixing together on paper rather than the brightness of pixels on a monitor.
the dots!
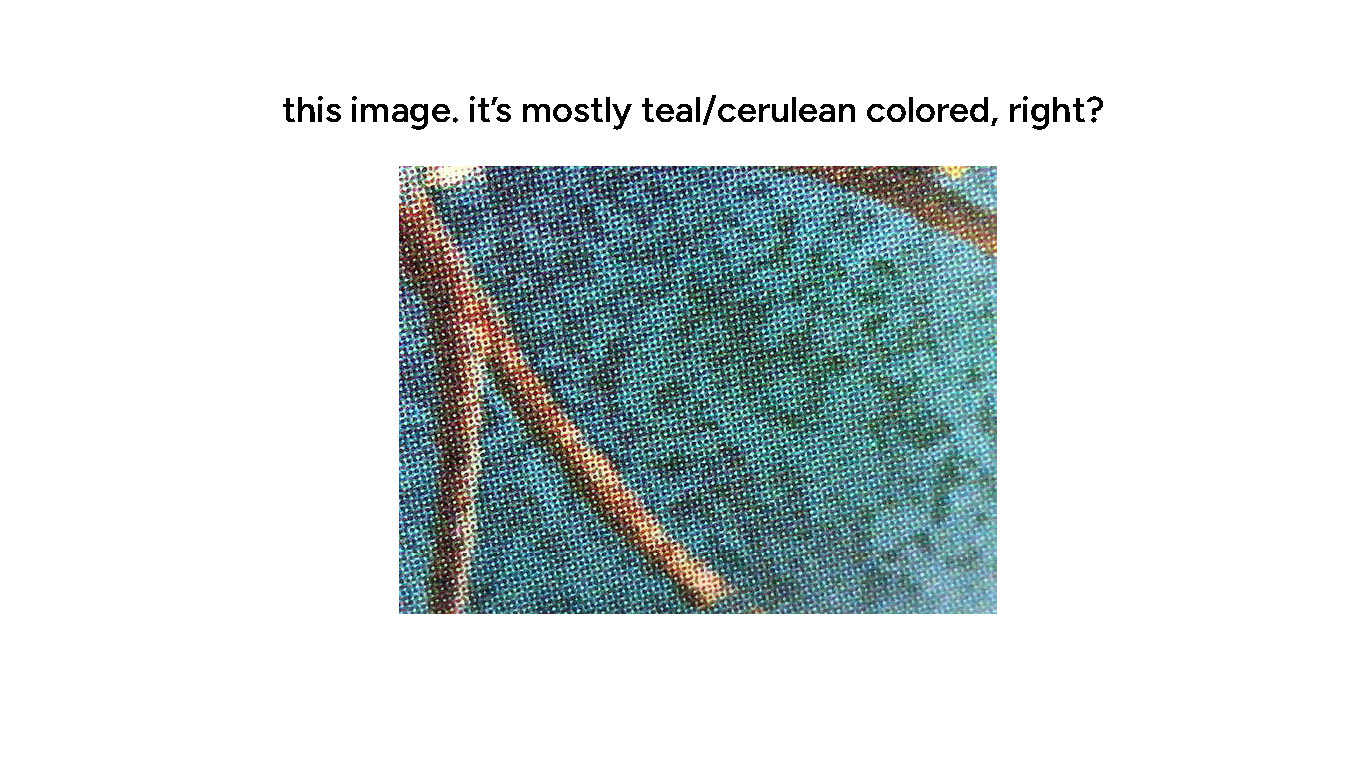
But the most fun part to me is also talking about how the printing of each of these four colors works – in this example, you might think that this teal color would be mostly made up of the Cyan and not much else…
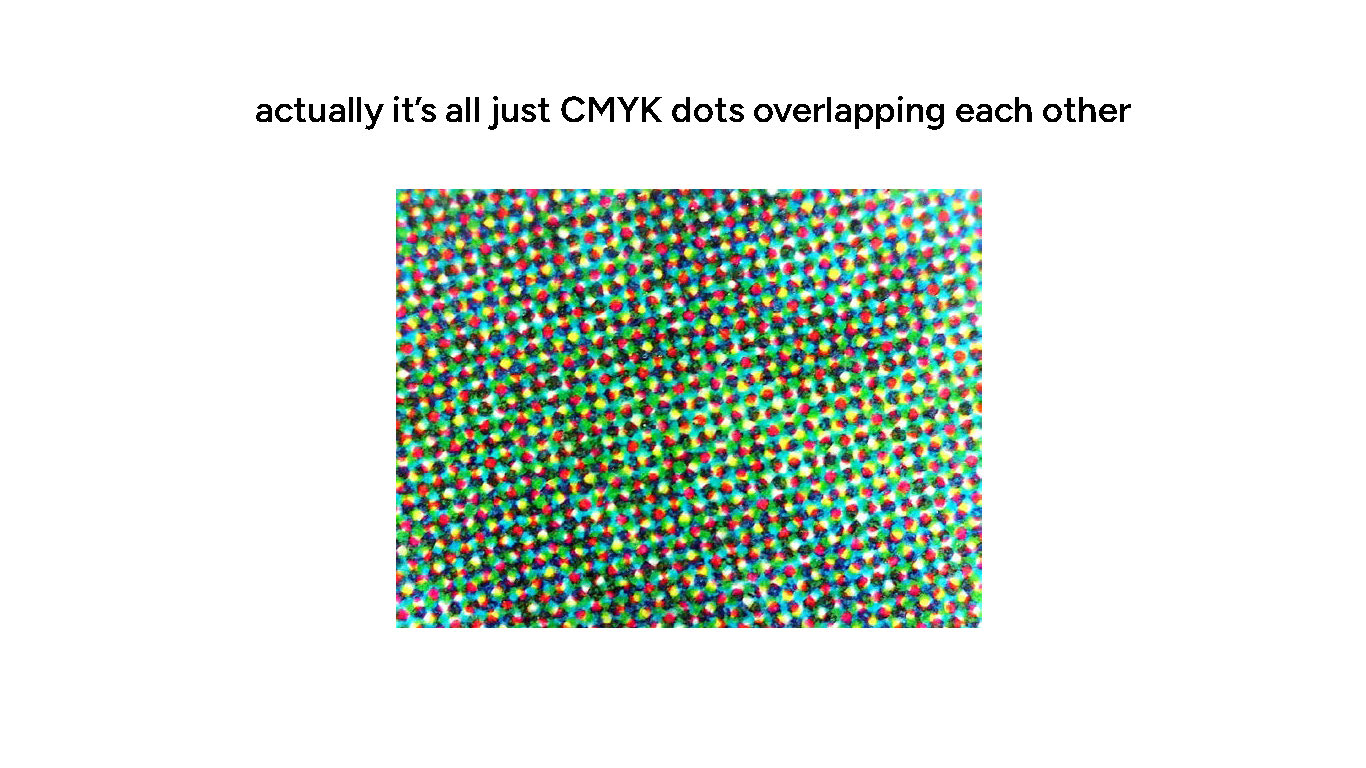
But upon closer look, it’s actually all four colors, overlapping in specific dot patterns. (this is also why resolution is often called DPI – dots per inch) (also why I’m somewhat peeved when people try to talk about DPI in a digital context. it wouldn’t be DPI then, it’d be PPI – pixels per inch)
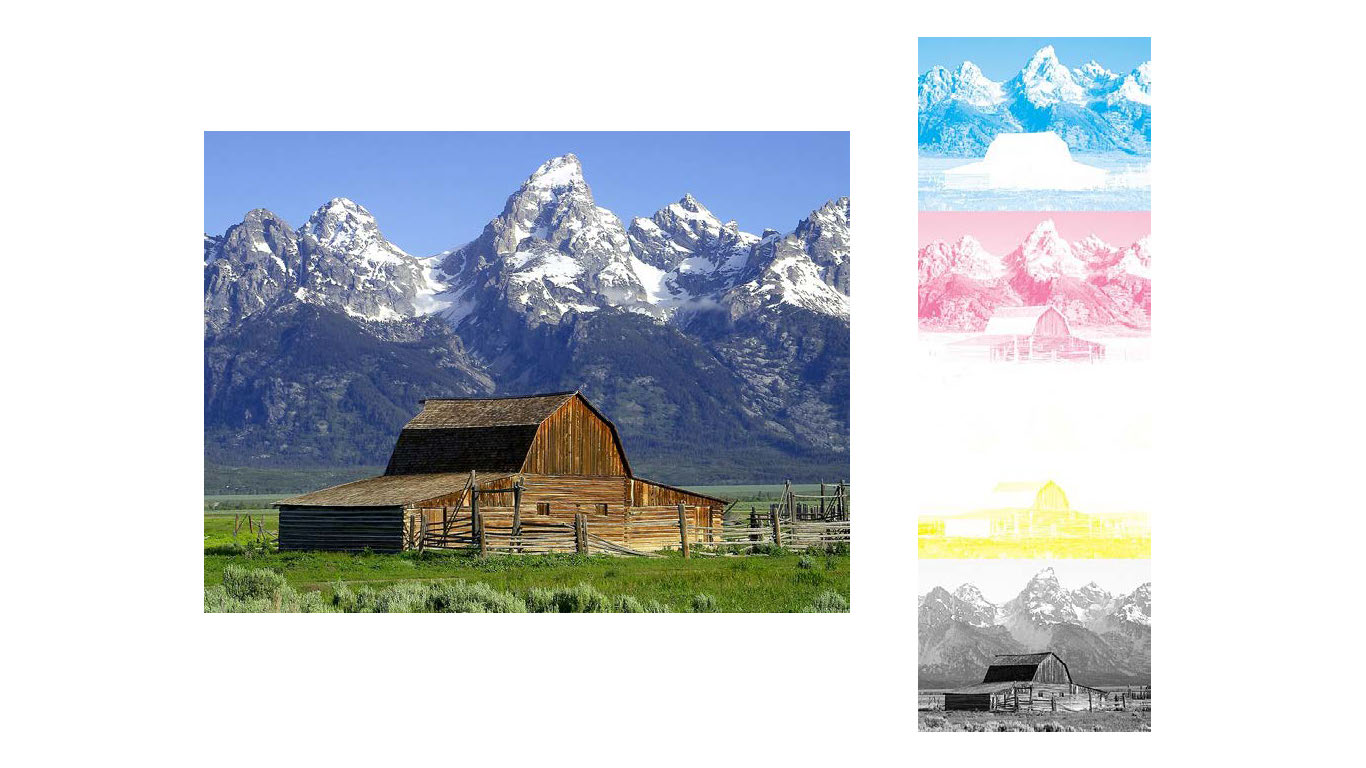
So basically every CMYK print is just 4 different monochrome bits of the image overlapped with one another! (also was the inspo for my digital cleaning (zine) look lol)
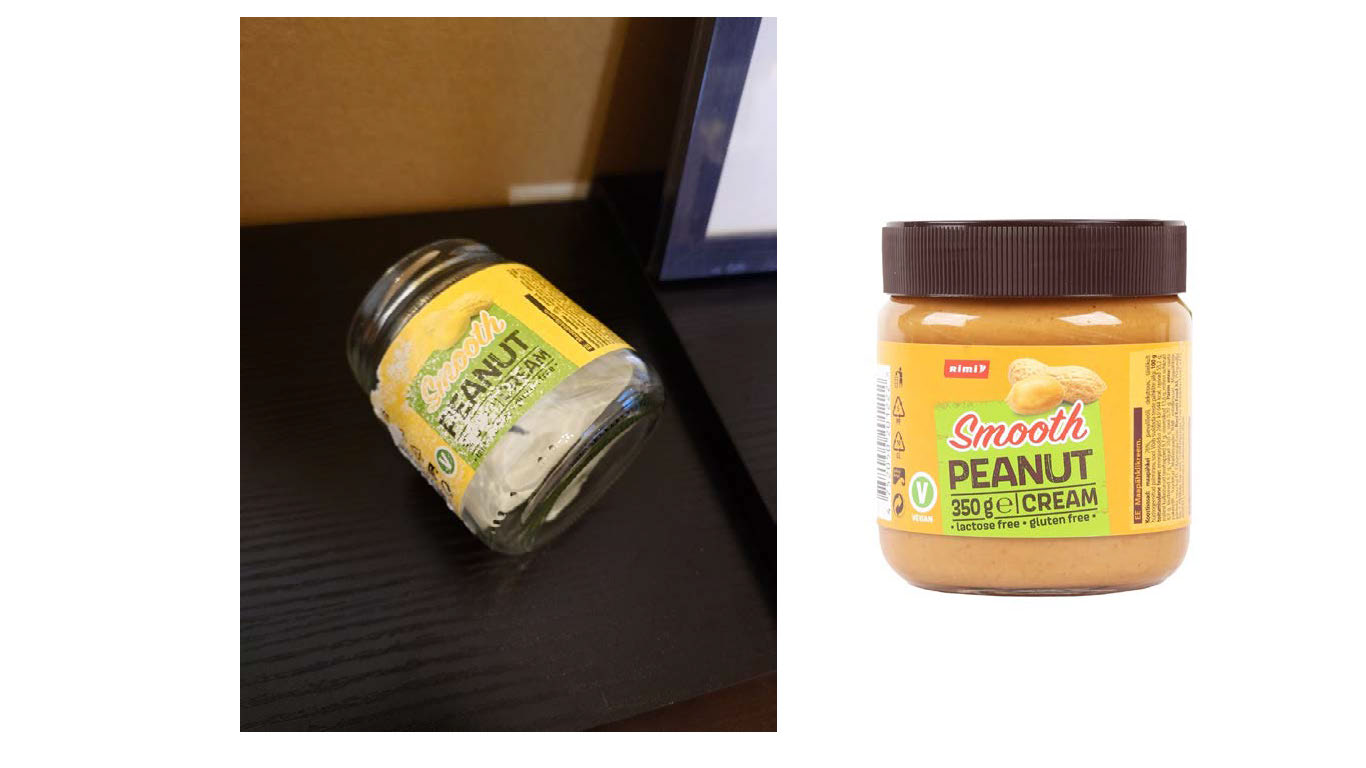
A small anecdote to tie it all in – I once noticed that a peanut butter jar I’d had in my dishwasher came out like on the left. For me as the print nerd I am, it was a fascinating discovery – the magenta layer of the print on the label must have been at the top and it was the one that got ‘washed off’ in the heat process of the dishwasher. But not anything below it!
paper
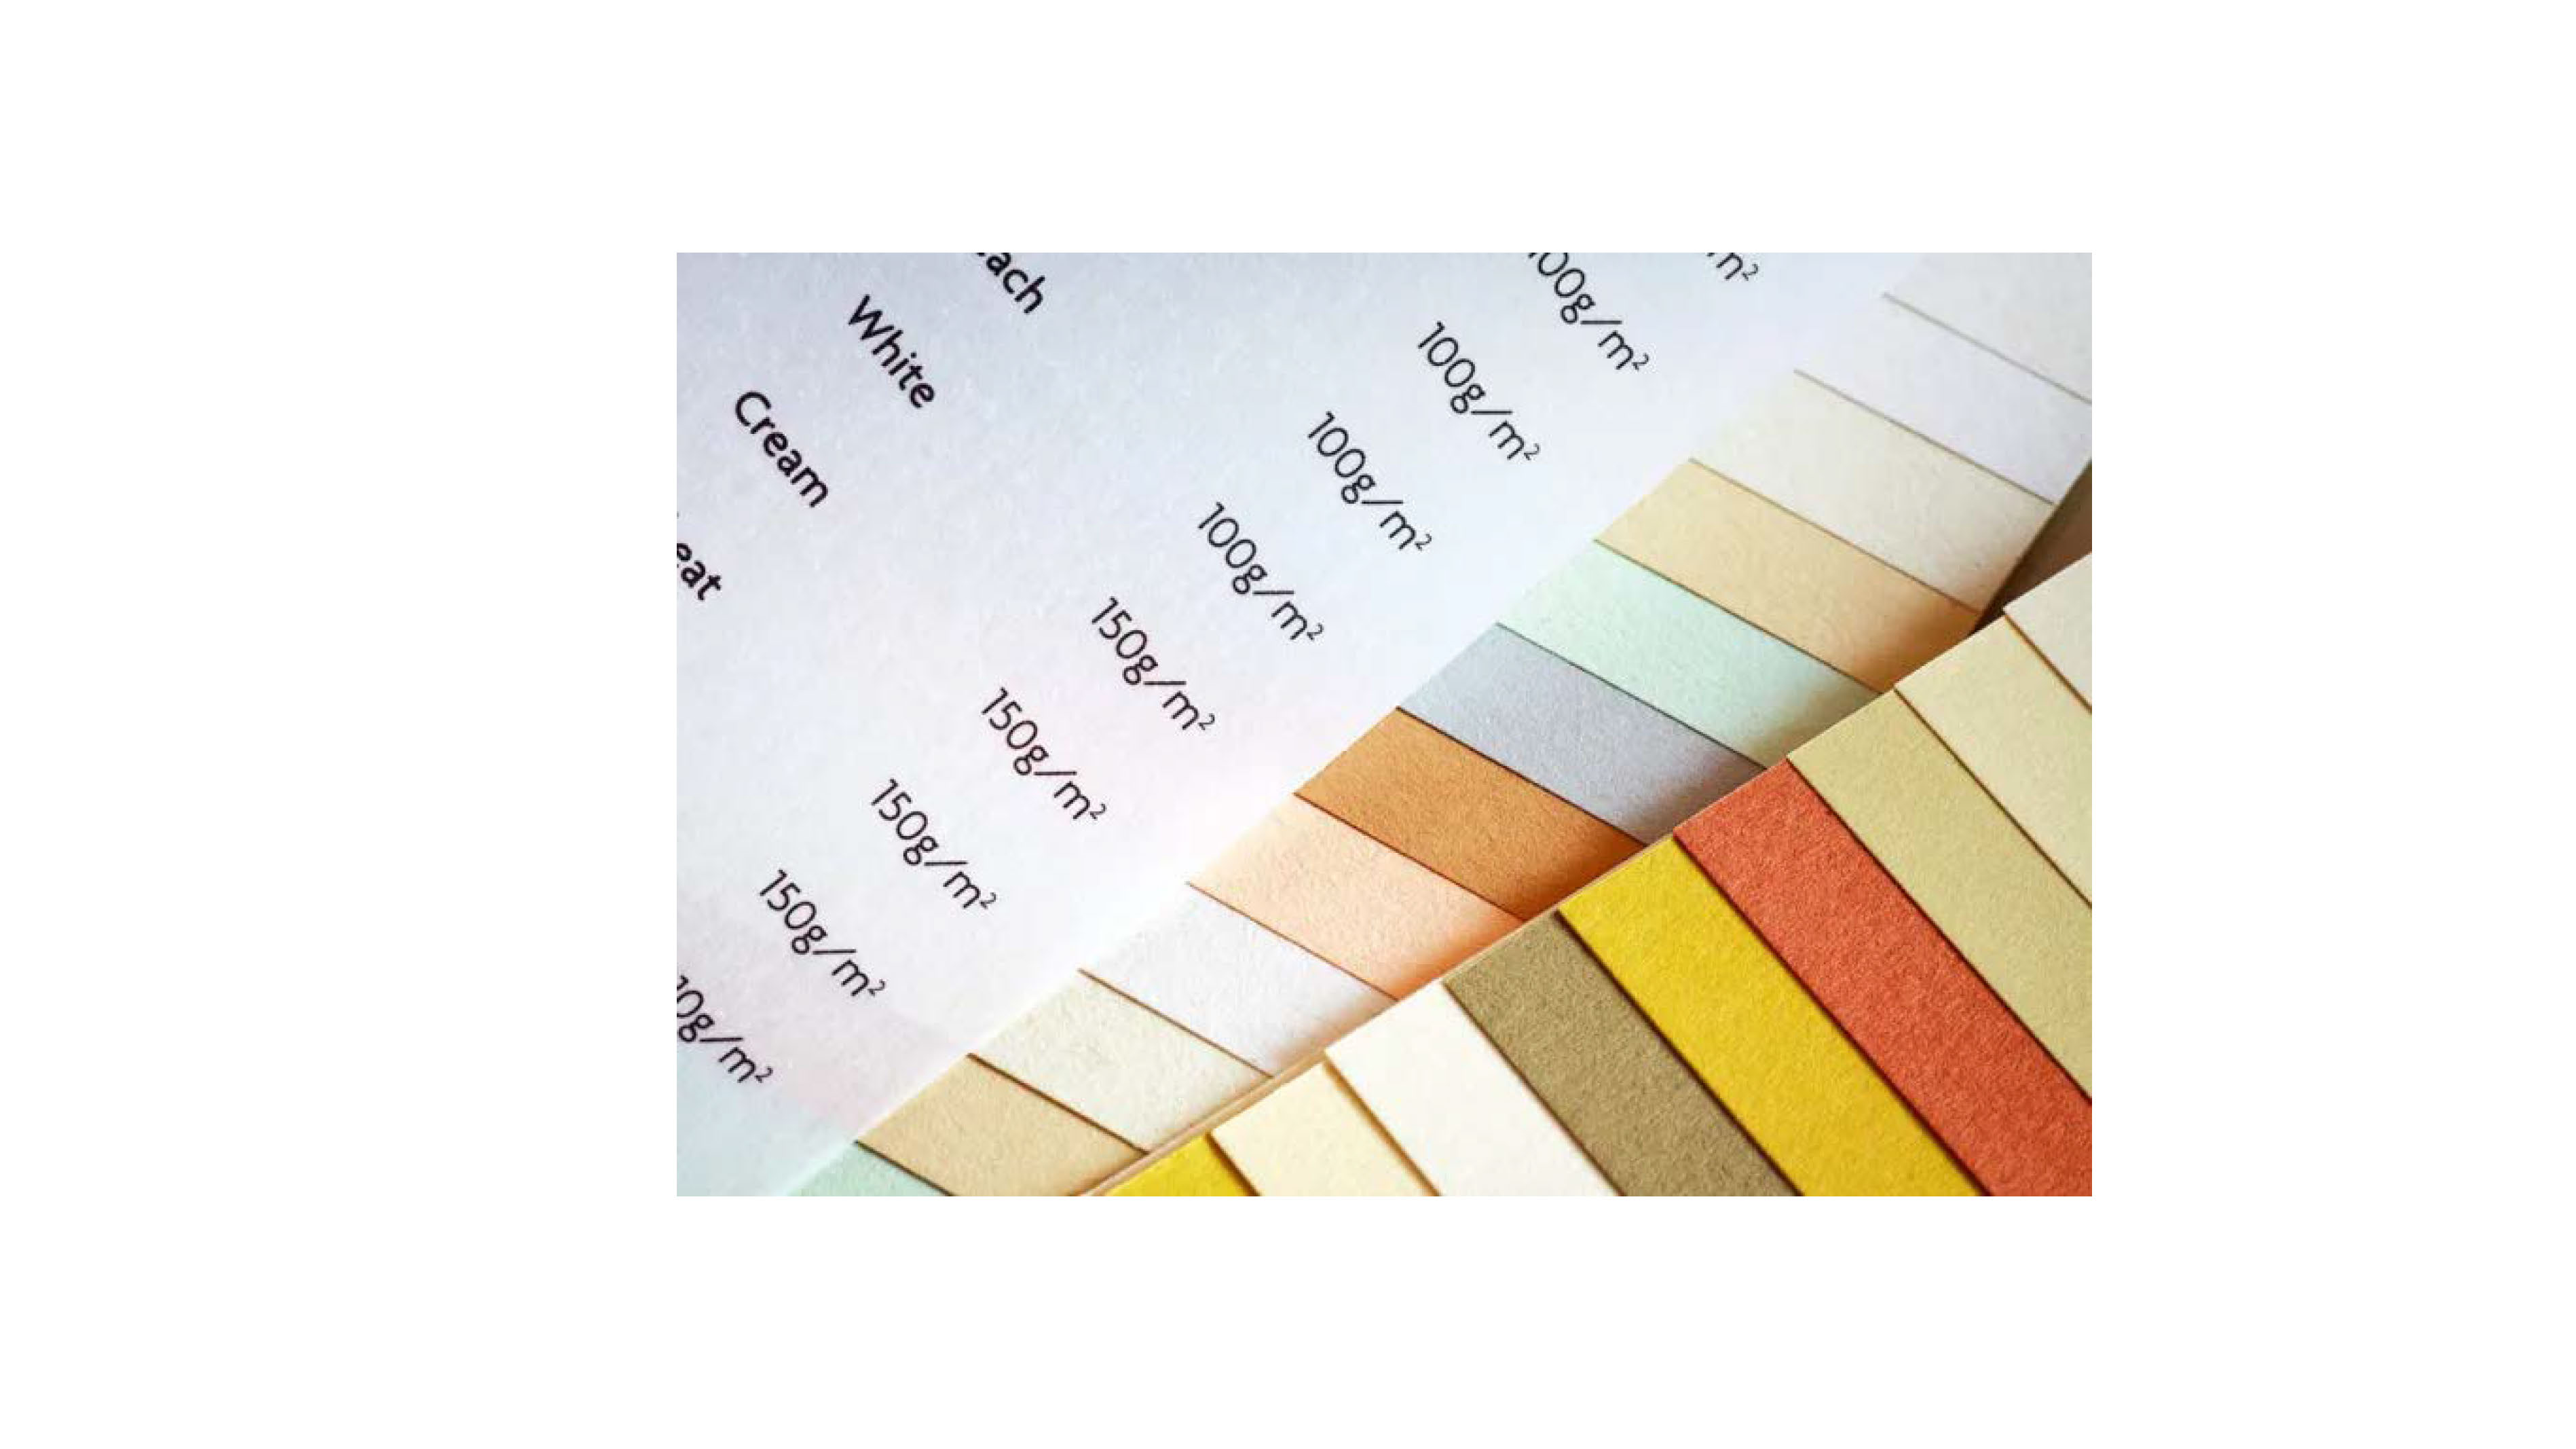
We all know and love our generic office/home printer papers but that’s not all there is to paper! The world paper is……. deep.
So deep I can’t even begin to describe it, honestly.
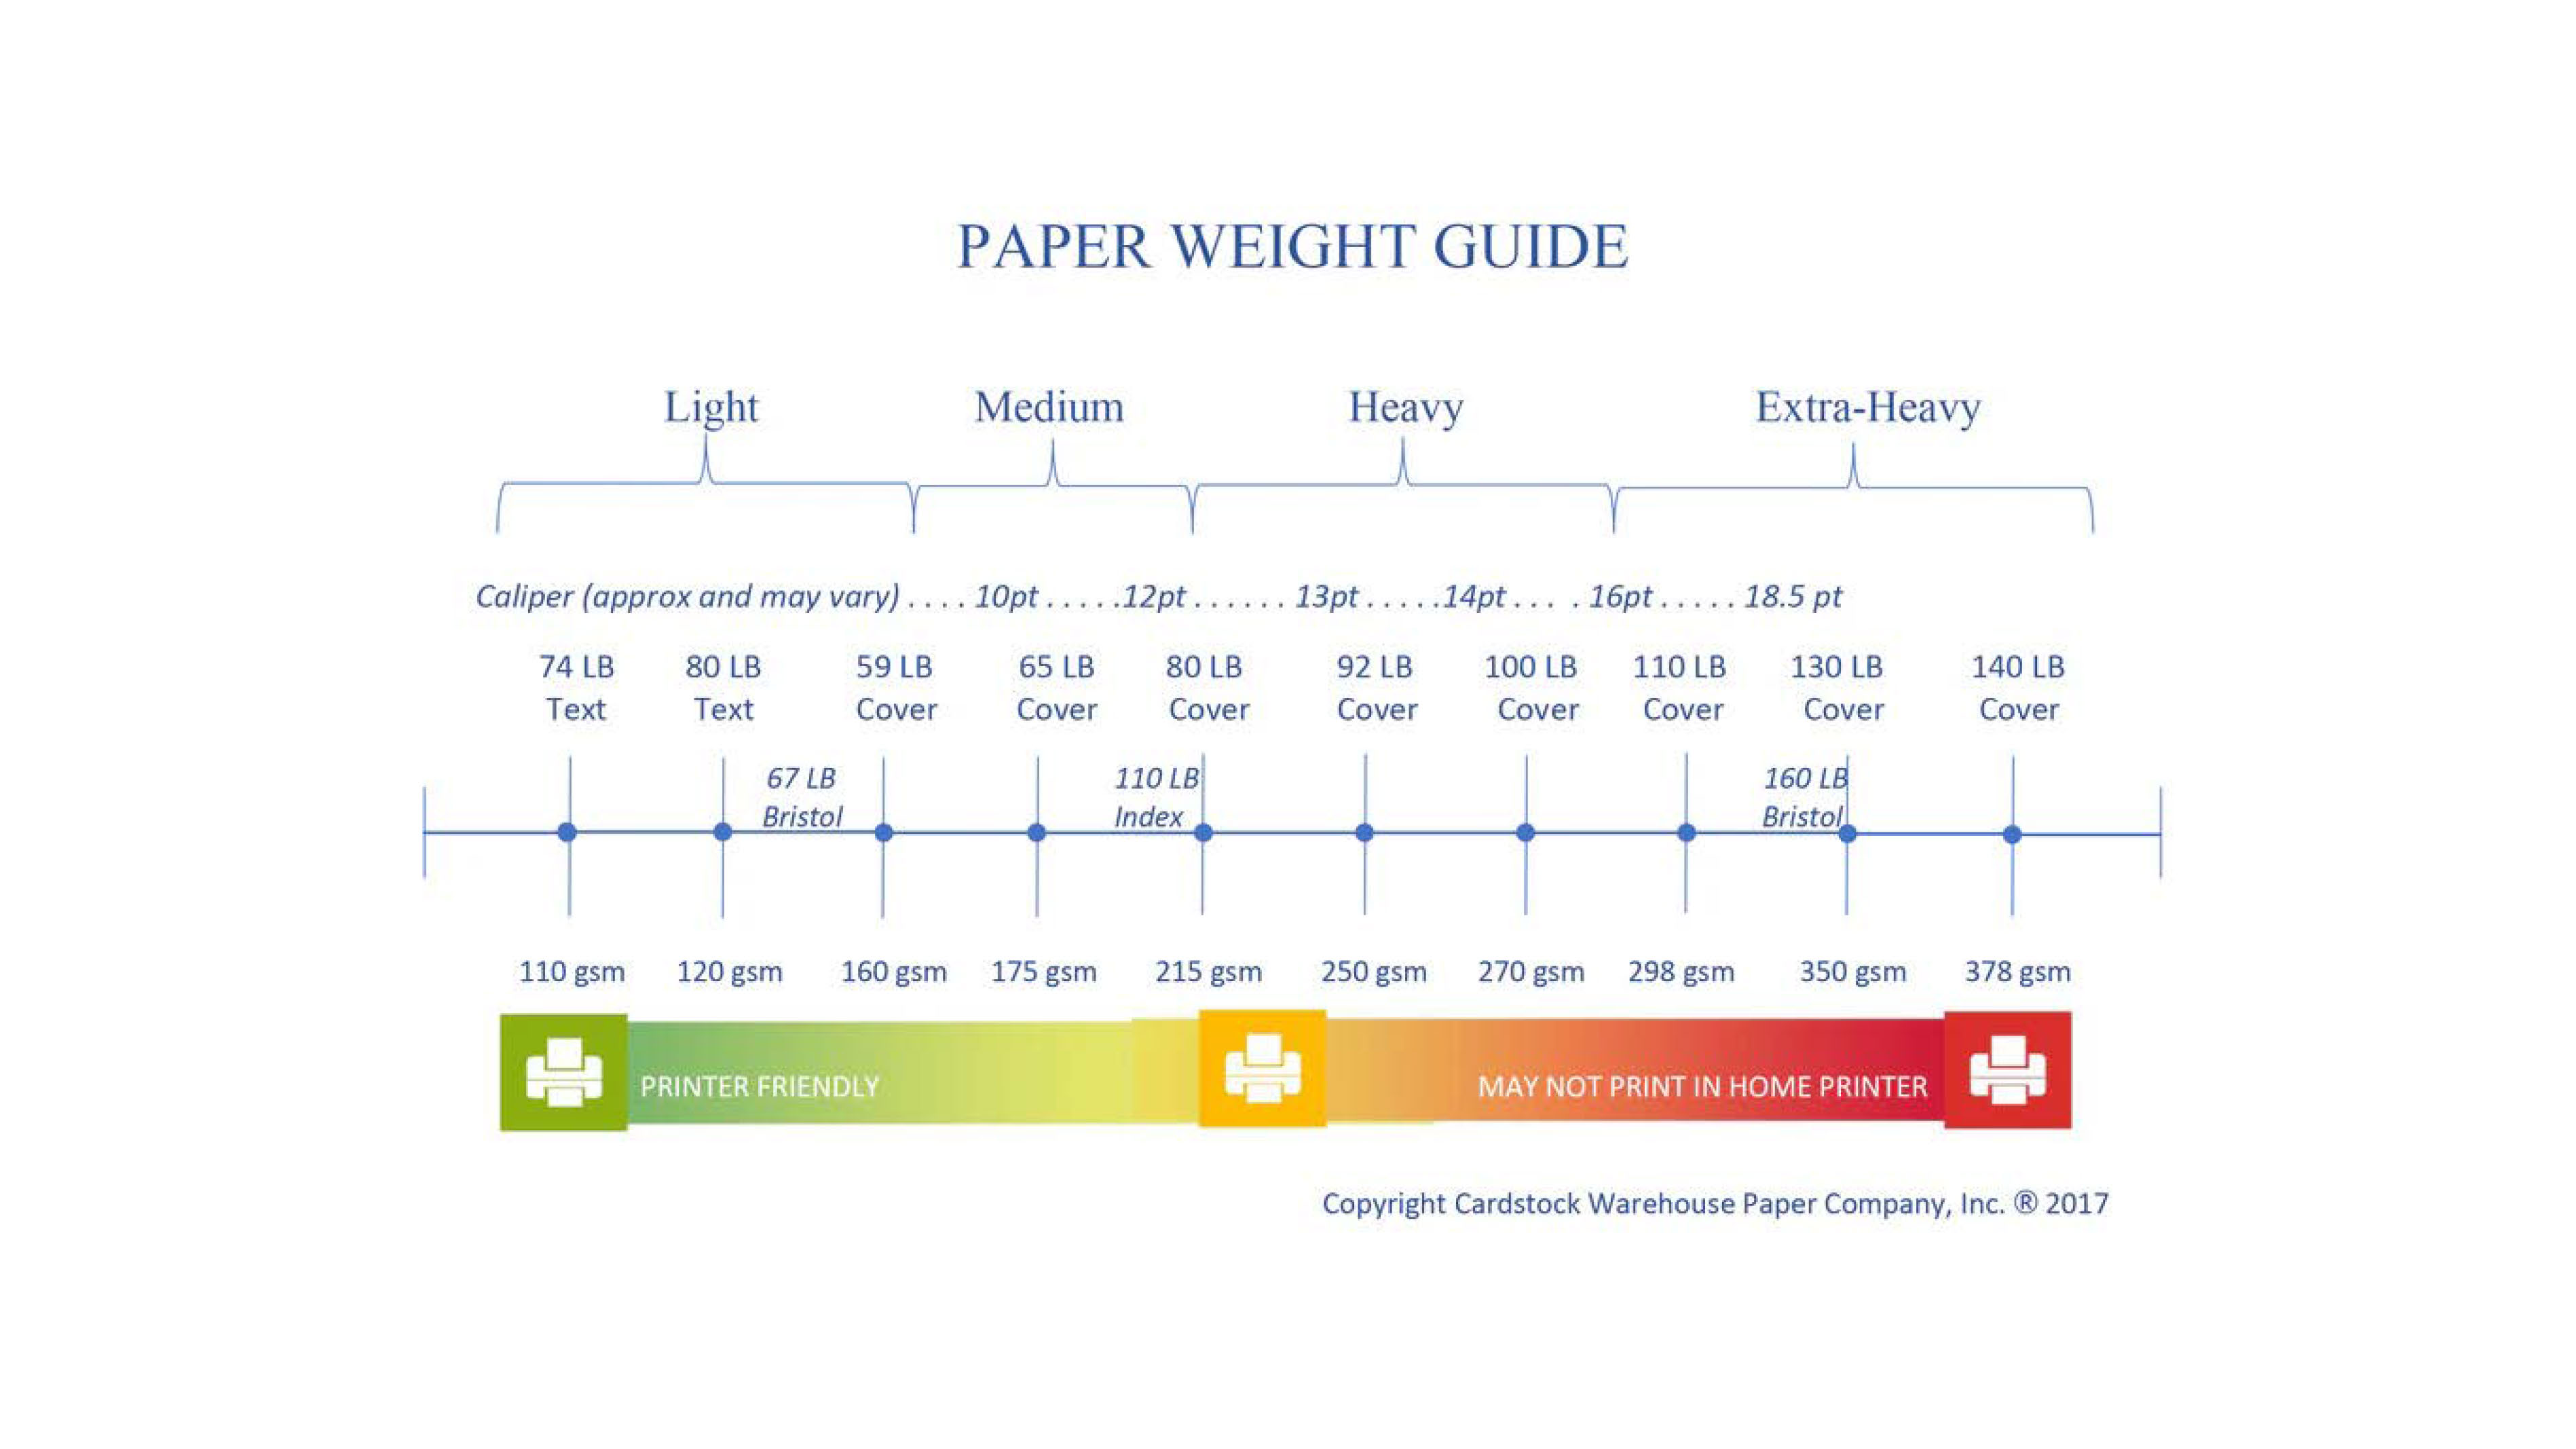
weight
But, this is the best I can do by.. googling a quick chart of the spectrum of paper weights! And honestly, this isn’t even the end of it! But it’s a good guide if you are sticking to your home printer. Don’t overdo it. (although, again, when I did my digital cleaning (zine) which was printed at home, on a textured 300gsm paper, my printer took it like a champ. shoutout to it.)
coating
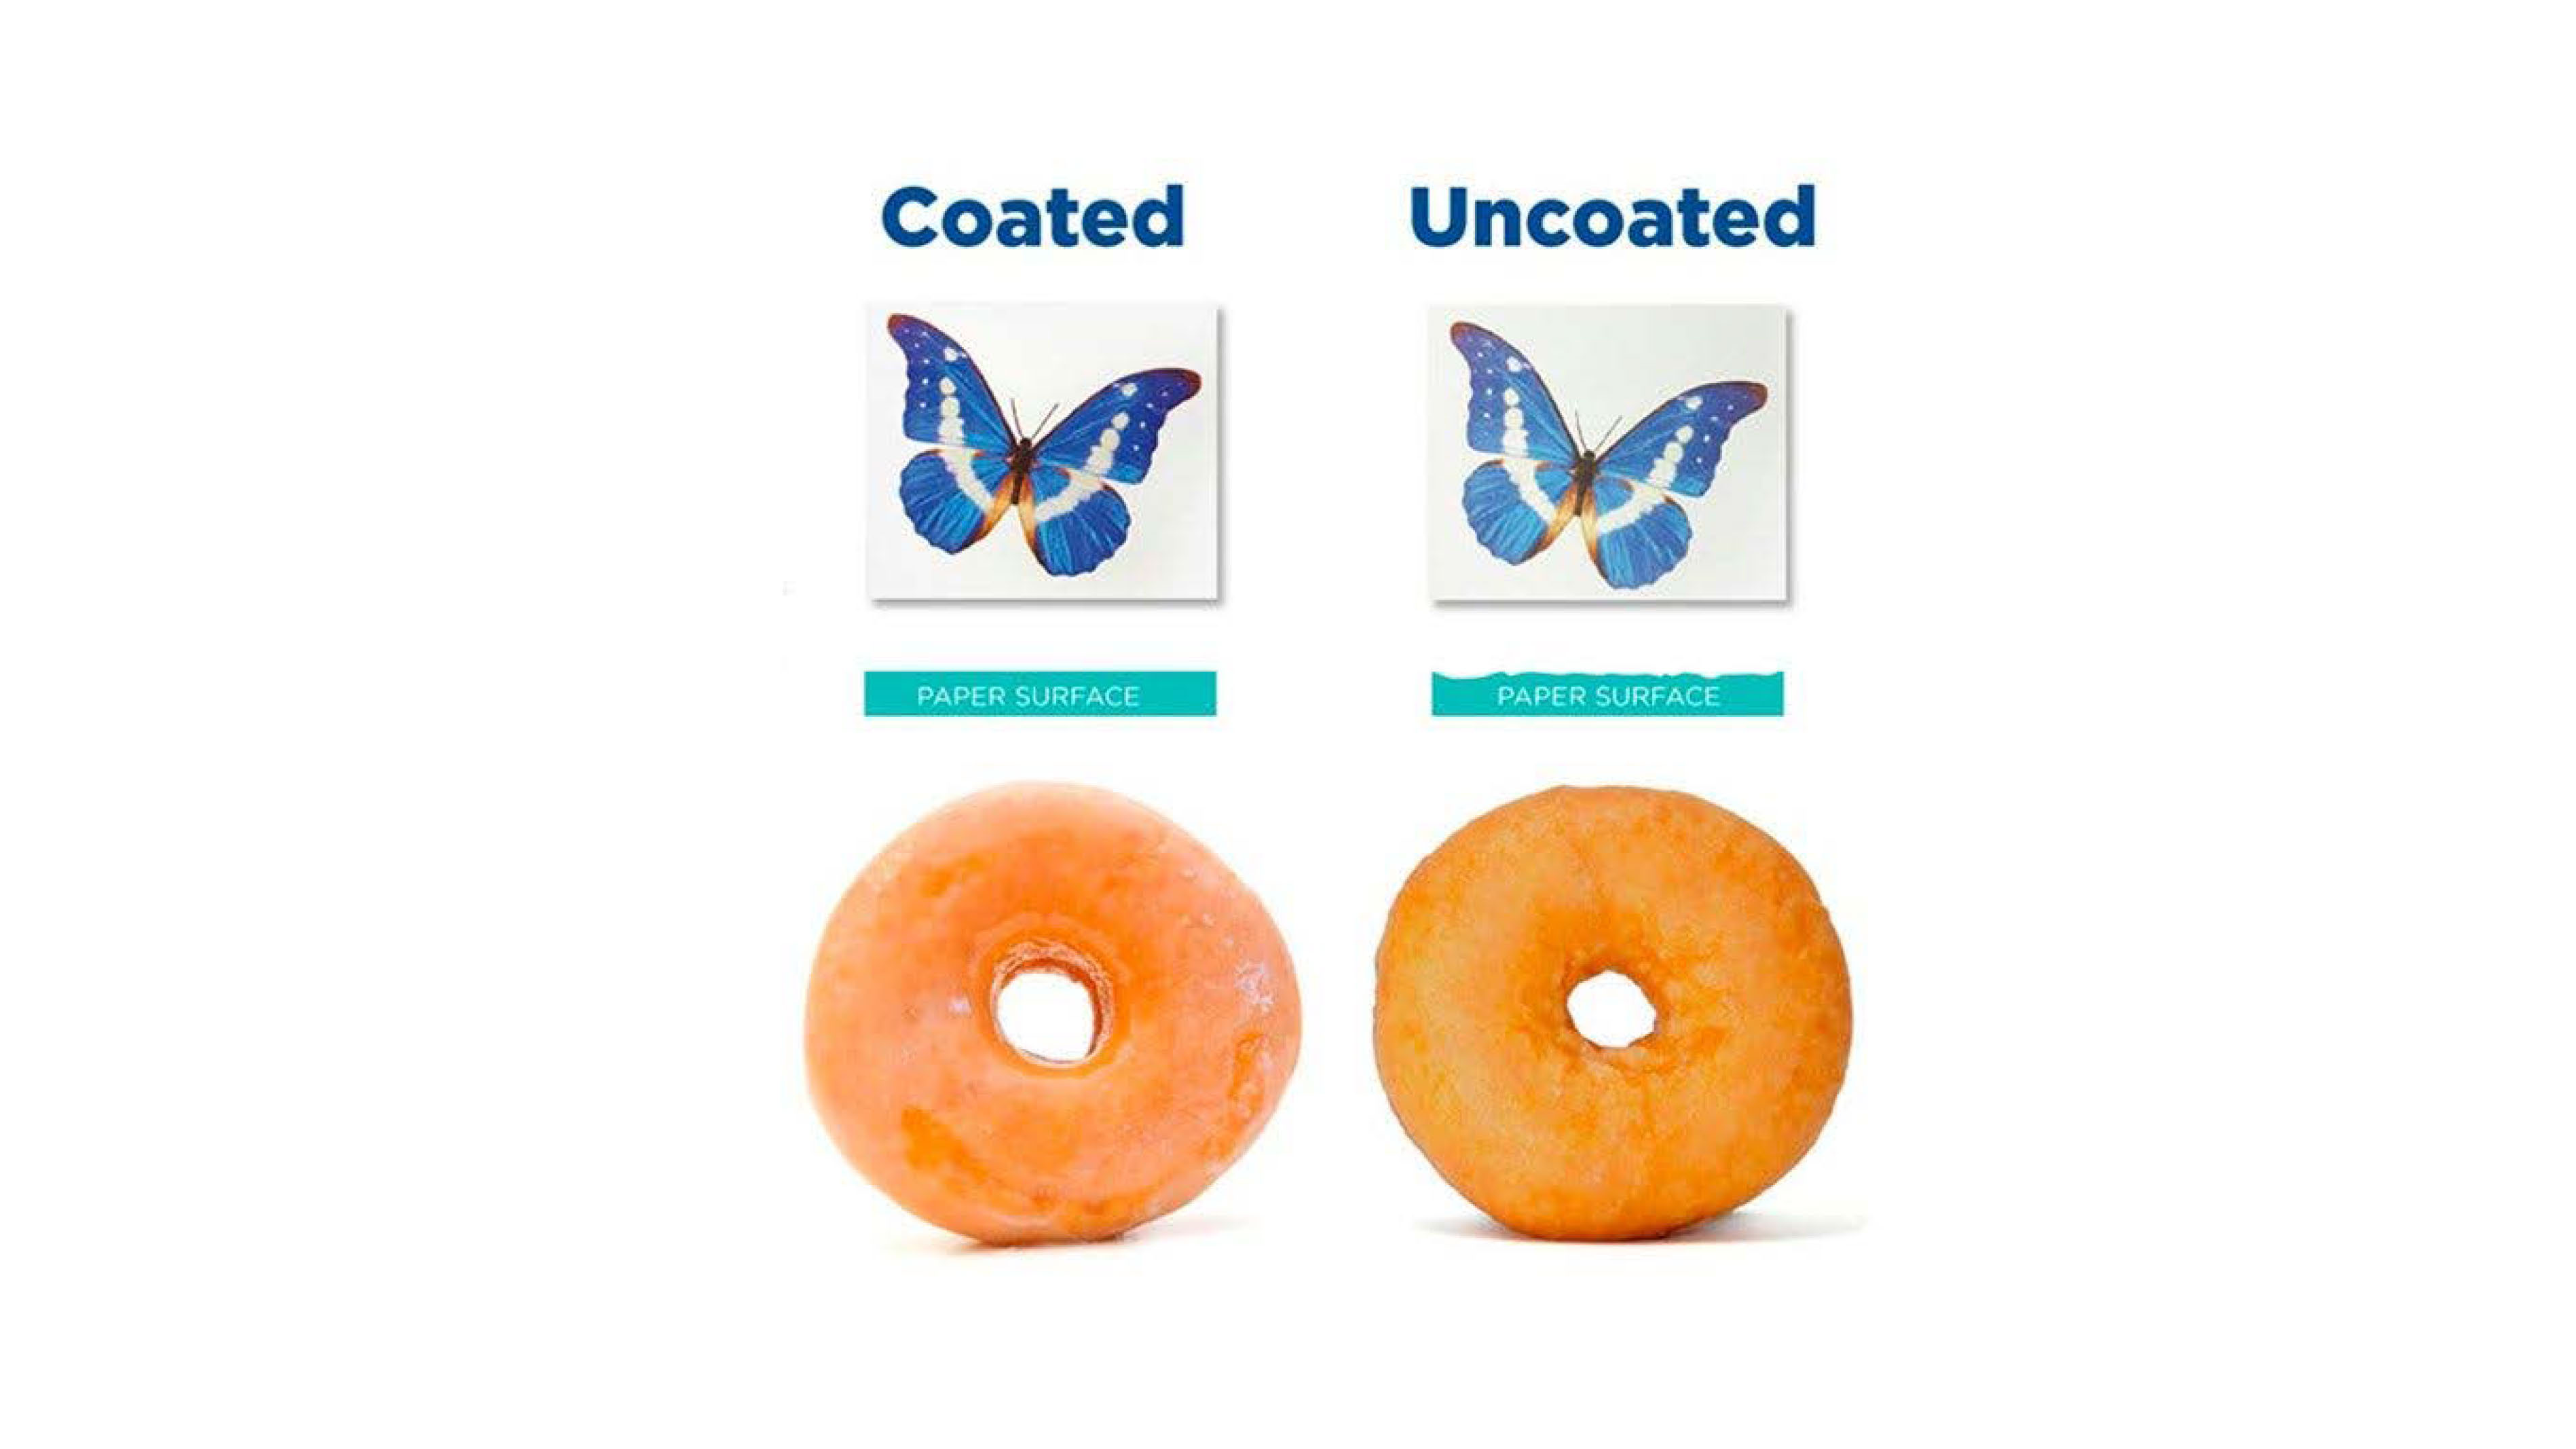
Aside from weights we’ve also got coatings! I really liked this image describing it visually, cause it basically is like a donut glaze. But for paper.
Uncoated paper is what you’d expect in something that you either are expecting to be writing/annotating, or you don’t need shining glare in your eyes… but the image prints on them won’t be as nice and saturated.
Coated paper is nice, shiny, (maybe too shiny, sometimes) and makes the colors POP. But don’t expect to want to write on it. You’ll have a bad time.
grain direction
So, the way that paper is made is by cutting up trees and turning them into a pulp, which then is poured into a thin sheet of…. paper and solidifies. Well! The pulp has an inherent direction it goes in, and while at first glance you’d think it doesn’t matter… it does!
When folding paper,
- if you’re folding along (as in, parallel) to the grain, it will fold smoothly.
- if you fold against the grain (as in, perpendicular), it will not fold smoothly.
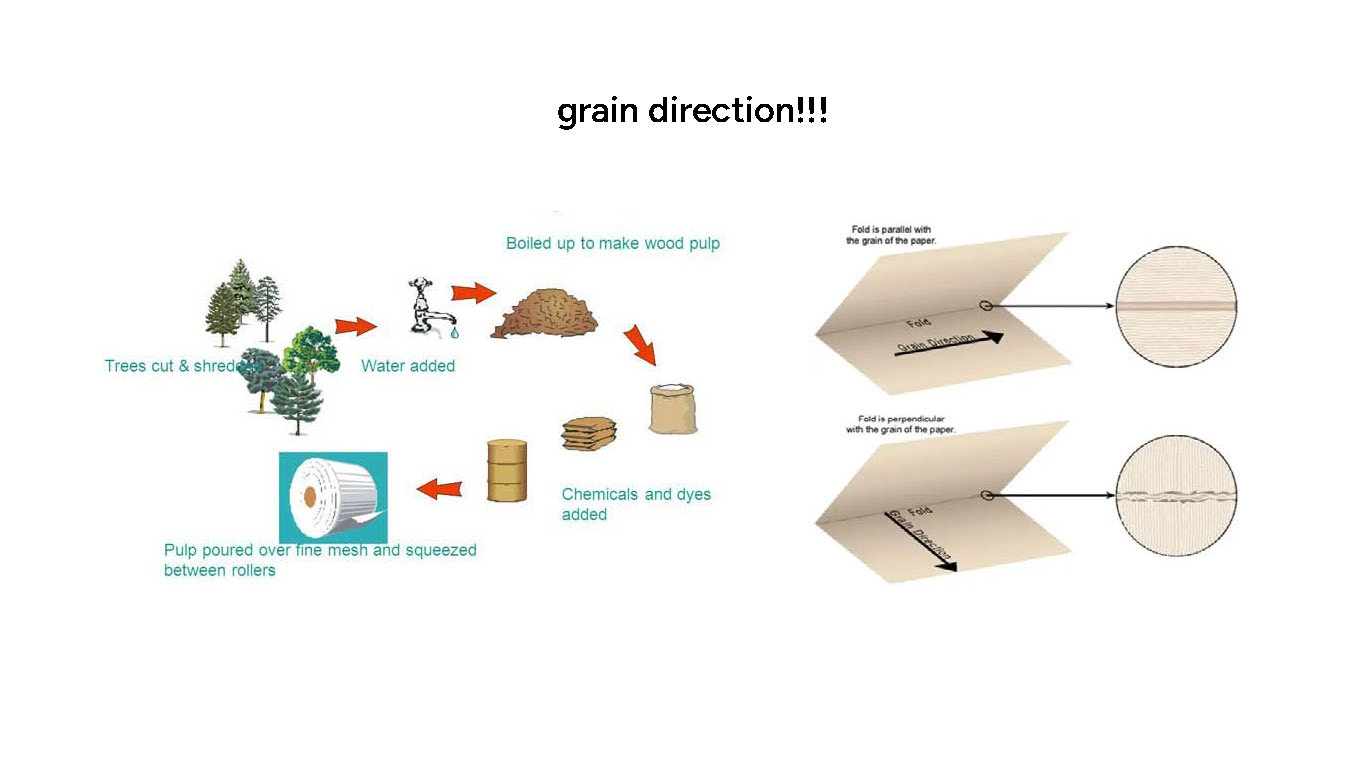
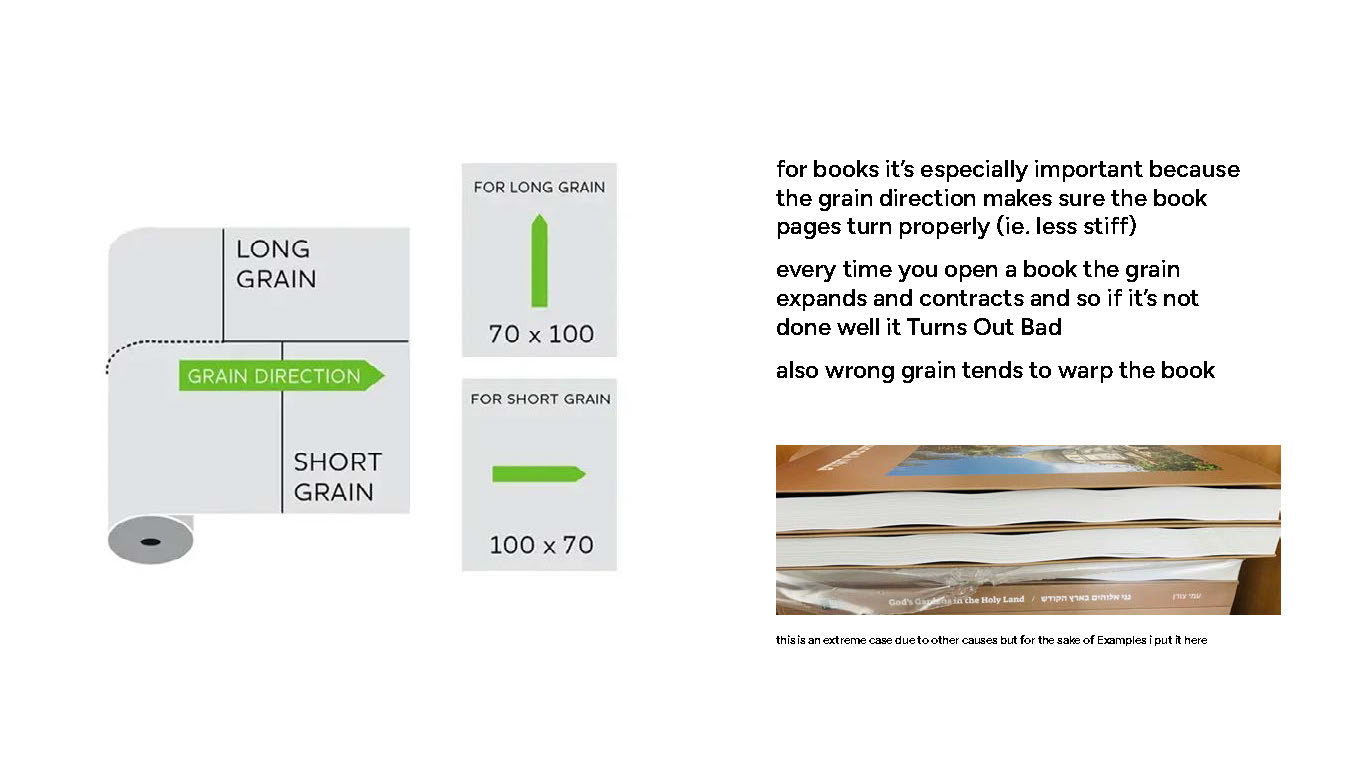
Of course, the roll of paper needs to be cut into sheets. If the grain direction is parallel to the longer side of the sheet, it is called long grain, and vice versa for short grain.
Does it matter if you have the grain direction wrong on a smaller project? No. It will just be slightly annoying.
For a book though? It is crucial. If you have the grain direction be perpendicular to the spine, it will warp, be hard to fold and open as every time you open a book it creates tension on the grain. So Be Careful.
bleed
Bleed, the thing that scares every artist having to create prints of their artwork /s
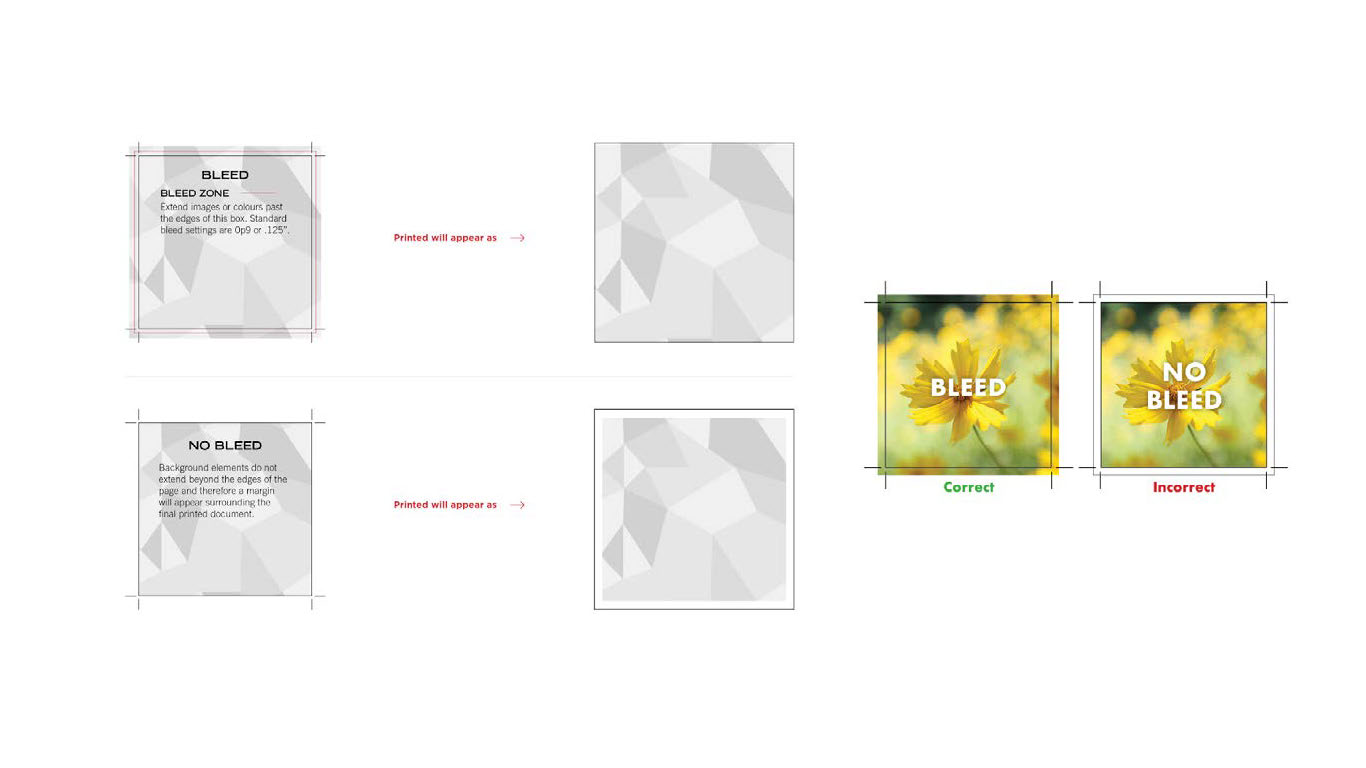
Okay, I’m kidding. Basically what it is is a safeguard. Unlike some home printers having “to the edge” printing, no commercially printed project is printed that way. Usually it is printed on bigger sheets which then get cut. Which is why having a bit of extra on the sides, aka a bleed, is crucial.
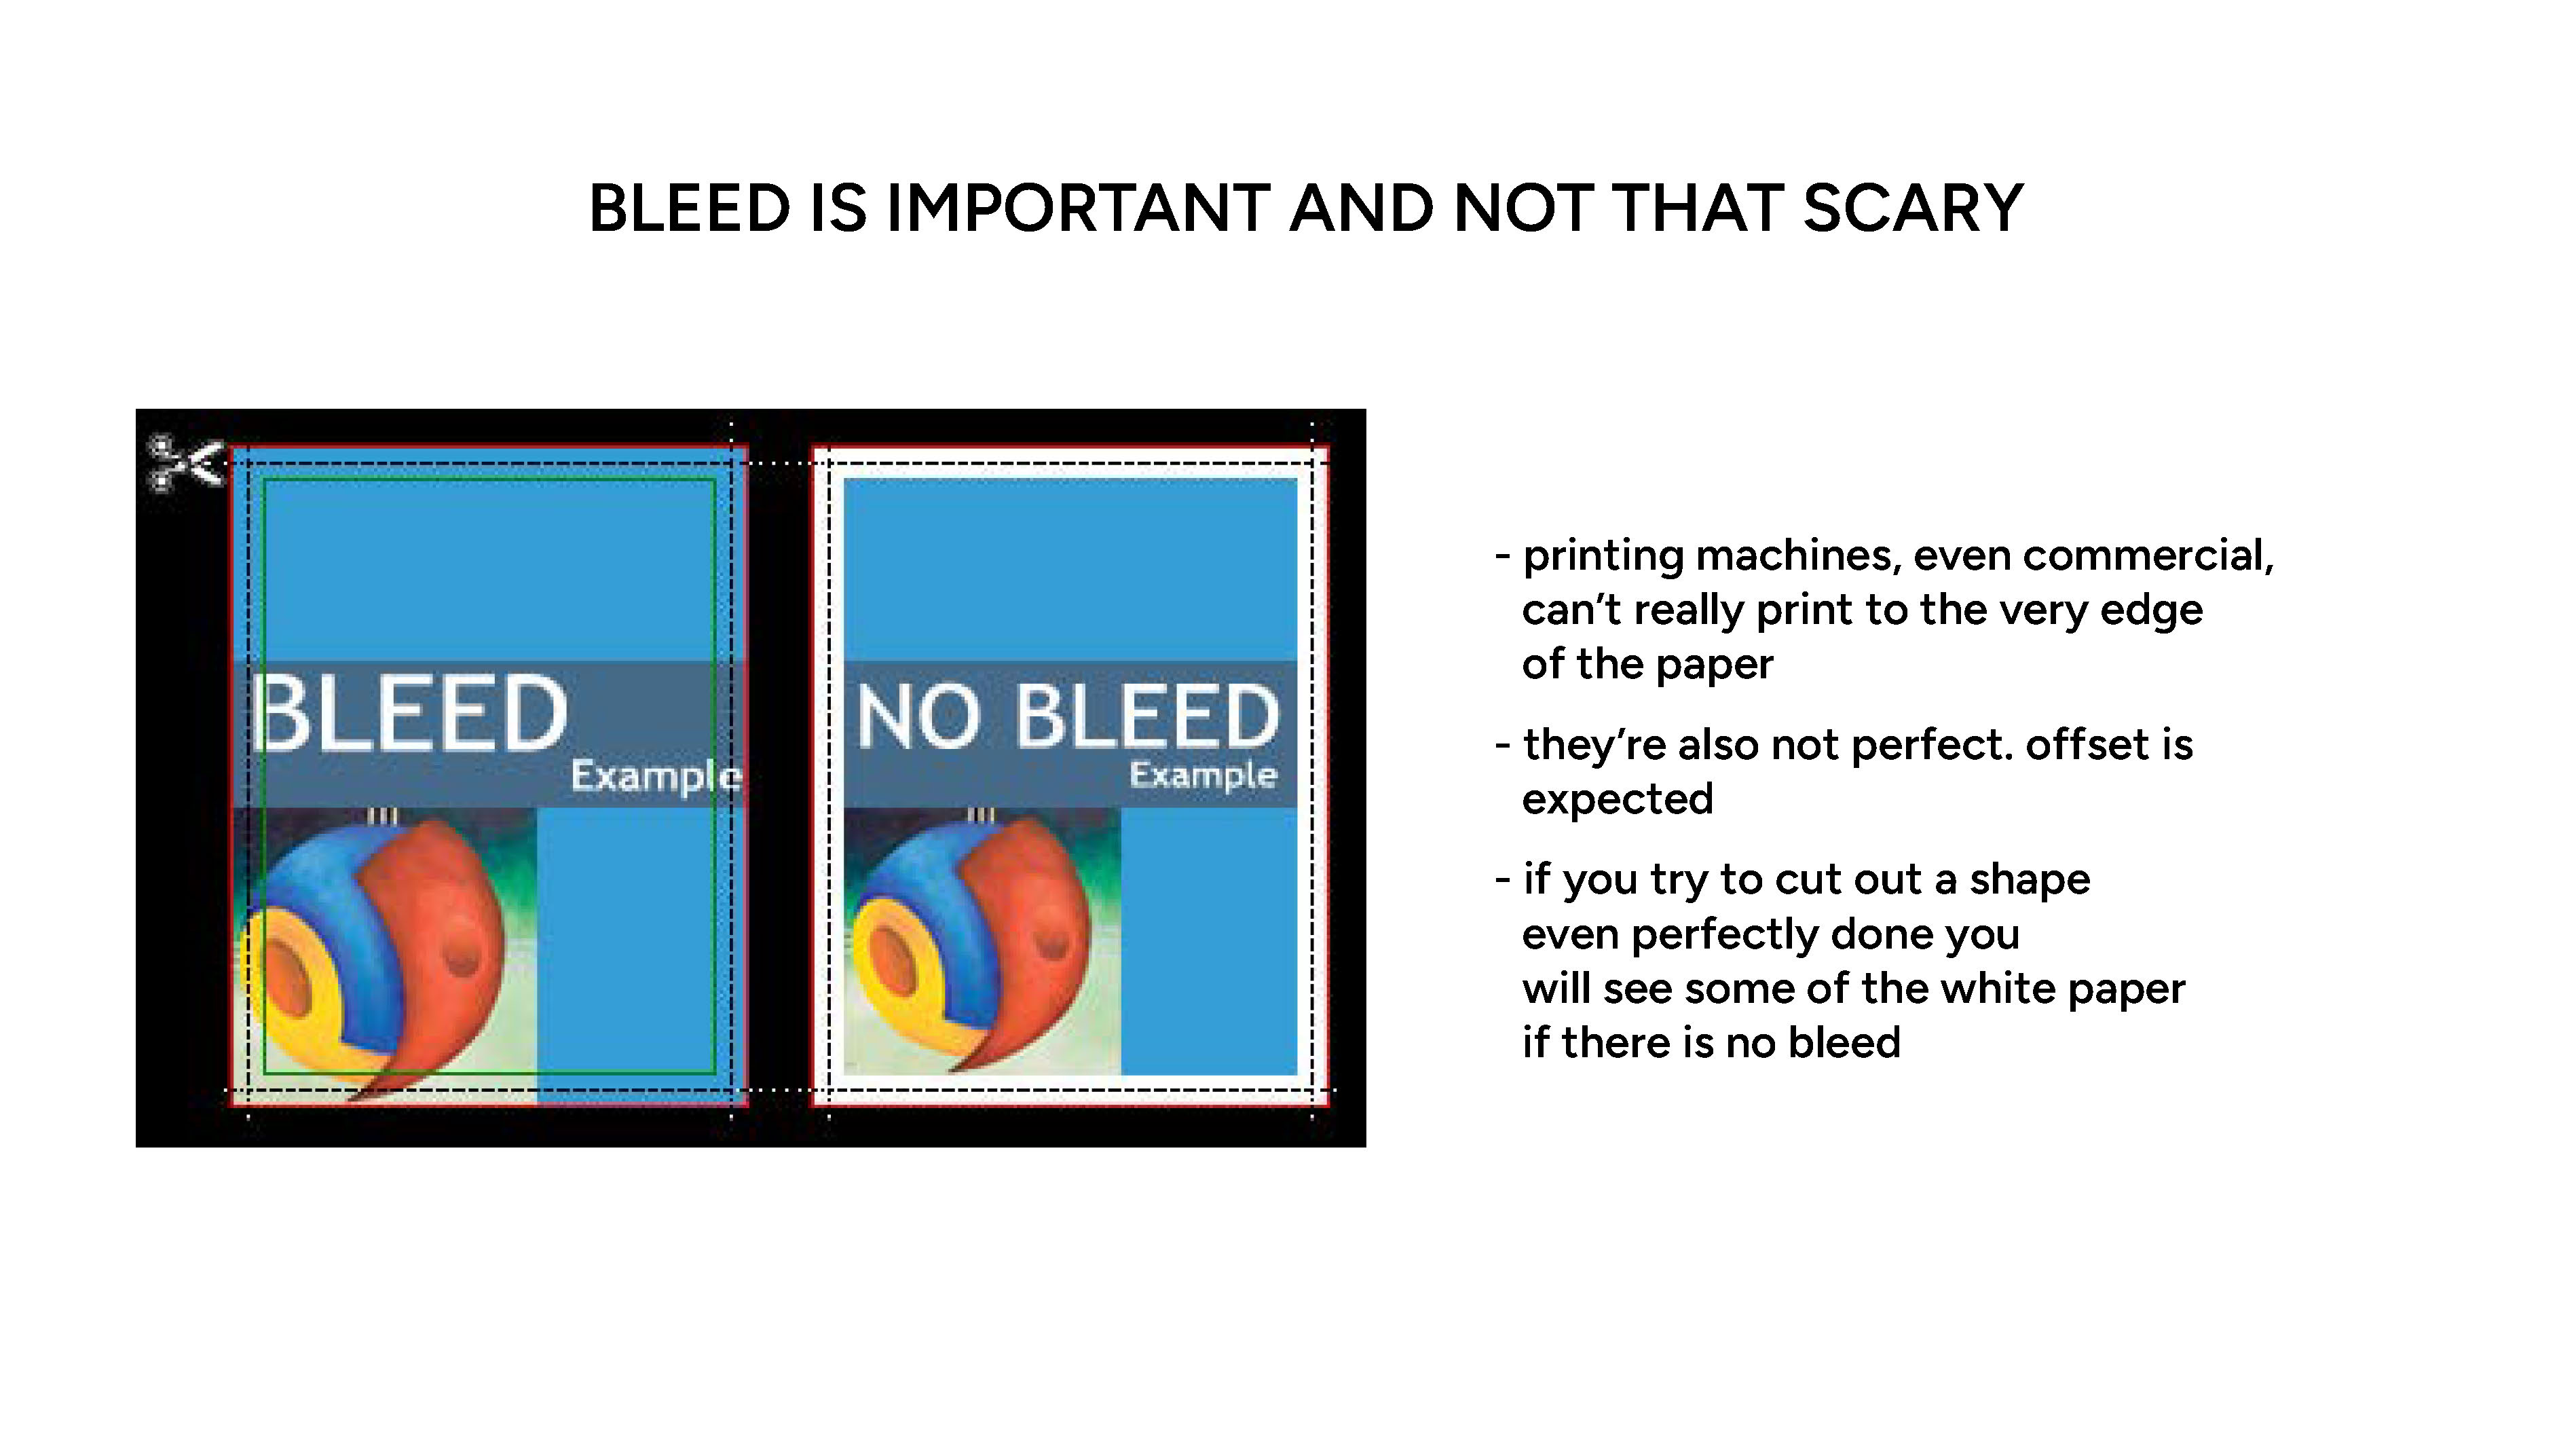
Basically just make your image go a bit beyond the edge. That’s about it. This is hard to explain without a live demo, sorry.
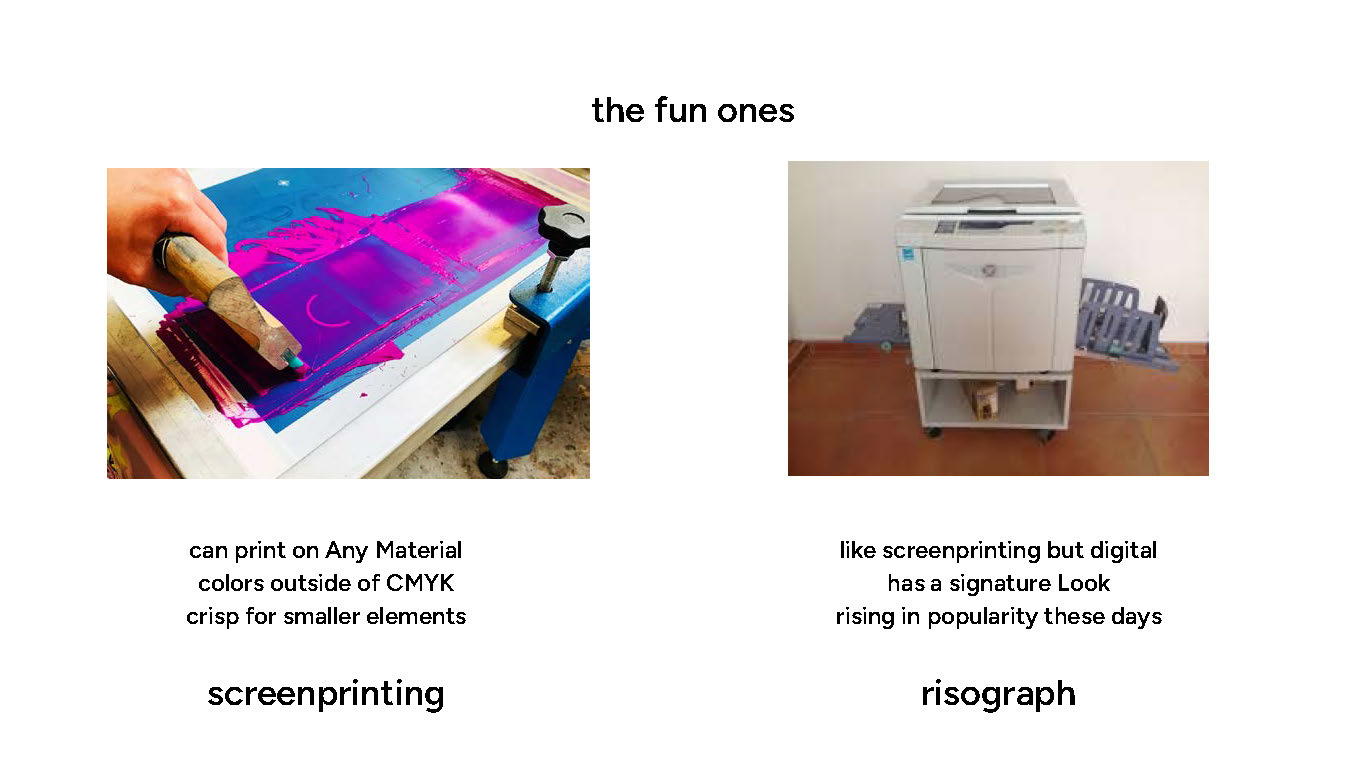
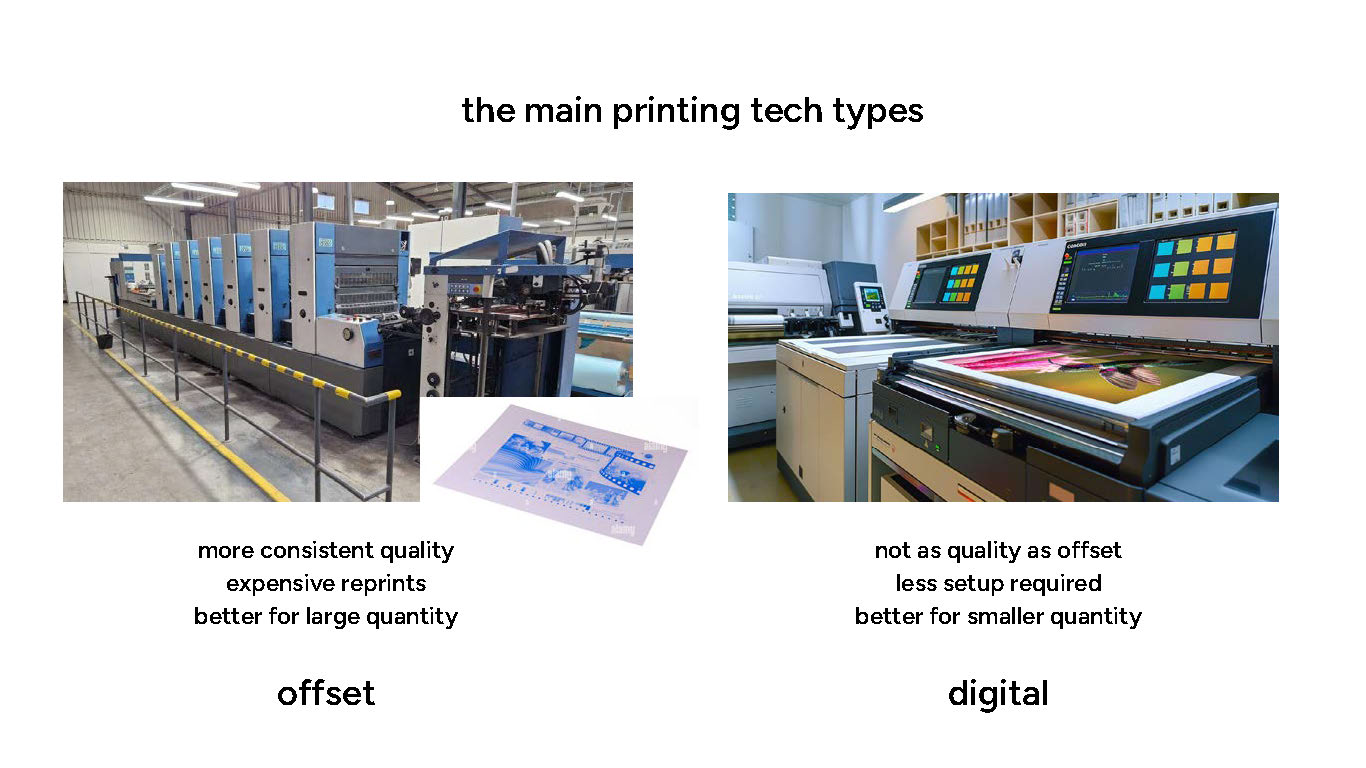
printing tech
THE FUN PART. To me. Outside of your home printer you know well (which, by the way, is a digital printing device, usually, but on a small scale) there are many different ways things get printed on things.
The main two are offset and digital! Offset is nicer and more reliable for huge quantities of prints, because your work literally gets put onto a huge metal plate and that is much more involved and analog than you think. (it’s like film photo development, if you know what that’s like!)
Digital is accessible and more alike home printers but on steroids. And honestly? Probably not even that much worse quality wise than offset these days. This is also why print on demand services can exist these days, which is cool.
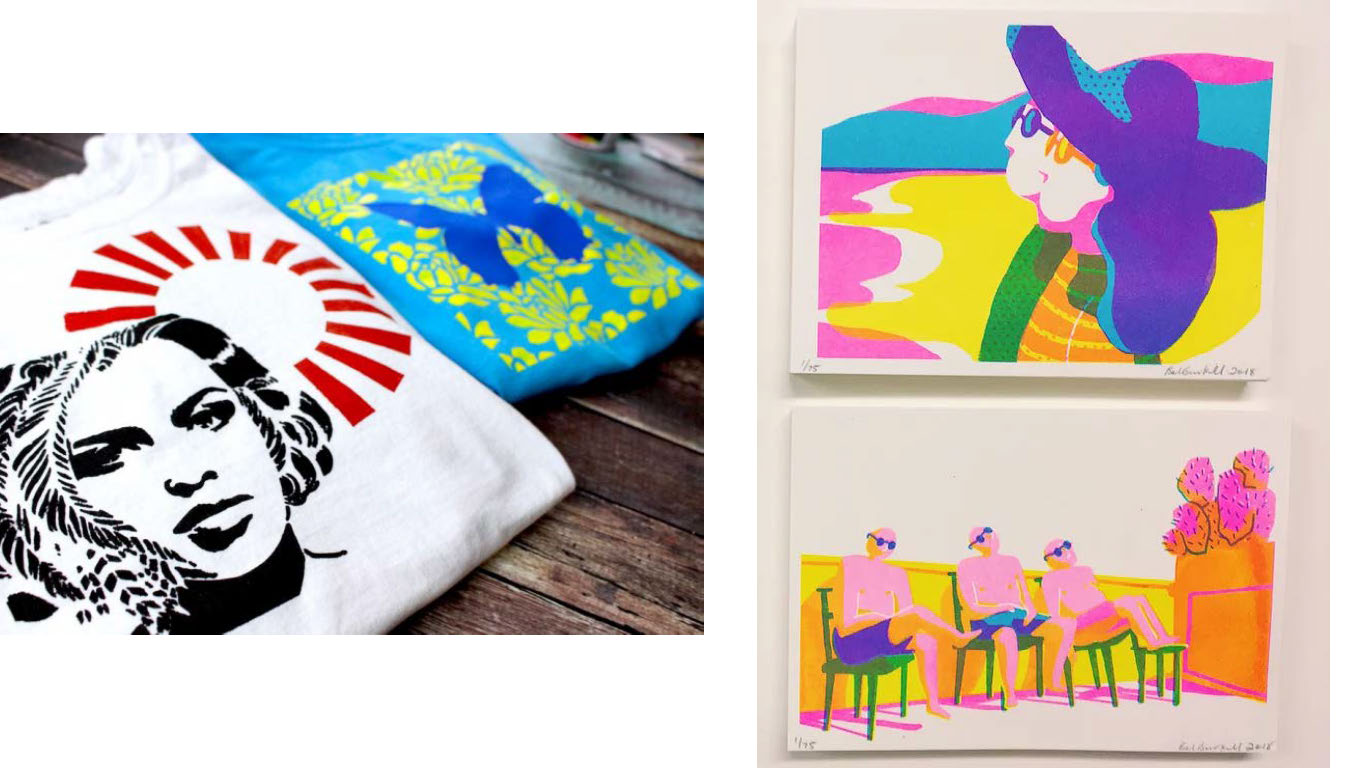
Screenprinting is like offset but even MORE like film photo development where you literally burn in your print onto a screen (like the ones in your windows that keep bugs out of your house, not computer screens) and then push some paint through it onto a surface of your choice (not even necessarily paper!)
Risograph is to screenprinting like digital is to offset print. It also kinda has it’s own vibe because even if it is less involved than screenprint, it’s got little print quirks to go with it. A lot of artists lean into it though and it is awesome.